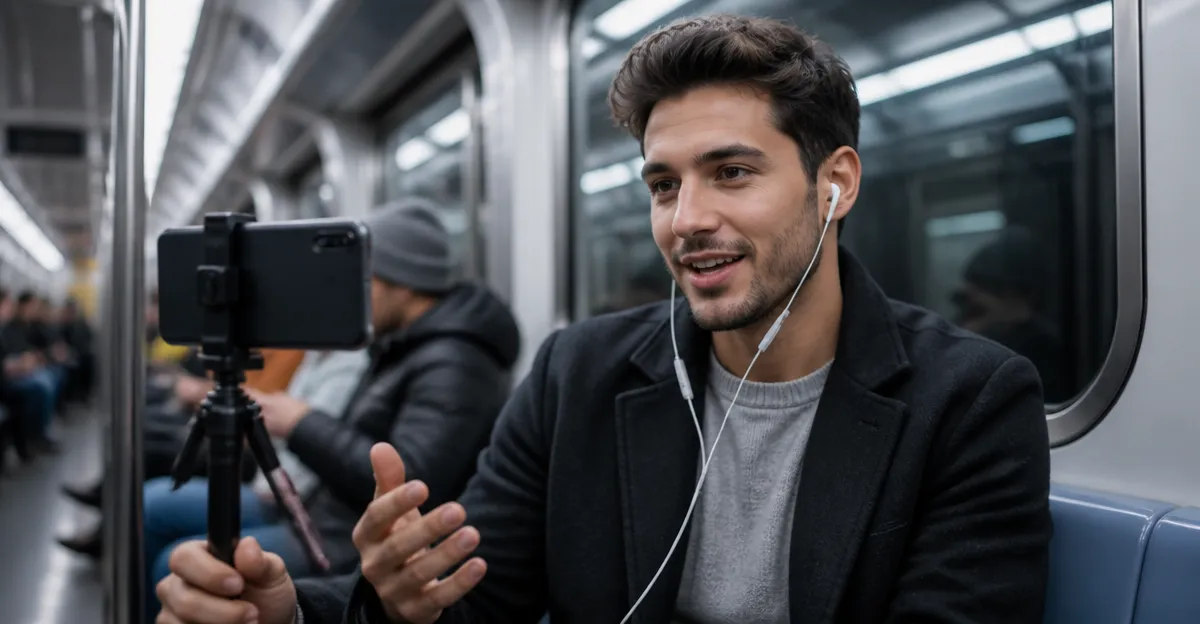
How to Live Stream from the Subway with Your Earbuds Microphone: Step‑by‑Step Setup & Audio Tips
Introduction
This guide explains how one can create a stable live stream while travelling on a subway, focusing on audio capture using earbuds. It outlines the equipment required, the configuration of streaming software, and techniques for minimizing background noise. By following the instructions, the reader will be able to produce clear, professional‑quality video despite the challenging underground environment. The information is valuable for content creators, journalists, and anyone who wishes to share real‑time experiences from public transit.
What You'll Need
- Smartphone or compact camera with USB‑C port
- Reliable mobile data plan with at least 10 Mbps upload speed
- Portable power bank (minimum 10,000 mAh) for extended sessions
- Tripod or stabilizing grip for steady video
- Noise‑cancelling earbuds with built‑in microphone – for example, Apple EarPods USB‑C
The Apple EarPods USB‑C provide superior comfort because their geometry matches the natural shape of the ear, reducing pressure during long streams. Their high‑quality audio drivers deliver clear voice reproduction, and the built‑in remote allows quick mute or volume adjustments without touching the phone. Compatibility with any device that uses a USB‑C connector makes them a versatile choice for both iPhone and Android users.
Step 1: Prepare Your Mobile Connection
Begin by confirming that the mobile carrier offers strong 4G/5G coverage along the intended subway route. Open the network settings on the device and enable LTE or 5G mode, then run a speed test to verify at least 10 Mbps upload speed. If the signal fluctuates, consider purchasing a signal‑boosting antenna that plugs into the USB‑C port. Secure the antenna with a clip so it does not interfere with the earbuds or the camera grip.
Step 2: Configure Streaming Software
Select a streaming application that supports external audio input, such as Streamlabs Mobile or OBS Studio (via USB‑C to HDMI adapter). In the audio settings, choose the earbuds microphone as the primary input device. Adjust the audio bitrate to 128 kbps to balance quality and bandwidth consumption. Enable automatic gain control to prevent sudden volume spikes when the train brakes.
Step 3: Optimize Earbuds for Clear Voice Capture
Insert the Apple EarPods USB‑C into the device and test the microphone by recording a short voice memo. Ensure the earbuds sit snugly in the ear canal; the ergonomic design reduces ambient noise by creating a seal around the ear. If background rumble persists, activate the device's built‑in noise‑reduction feature or use a third‑party app such as Krisp to filter out low‑frequency subway sounds.
Step 4: Secure Your Device and Power Supply
Attach the smartphone to a compact tripod or a handheld grip that includes a cold‑shoe mount. Connect a high‑capacity power bank to the USB‑C port using a short cable, keeping the power source within easy reach. Route the power cable behind the grip to avoid accidental tugging when the train accelerates. Verify that the earbuds remote is accessible so one can mute quickly if an unexpected announcement occurs.
Step 5: Conduct a Test Stream in a Controlled Environment
Before boarding the subway, start a private test stream from a quiet indoor location. Observe the audio waveform in the streaming dashboard to ensure the signal remains steady and free of clipping. If the waveform shows spikes, lower the microphone gain or enable the software's limiter function. Record a short clip of ambient subway noise to compare later and confirm that the earbuds effectively isolate the speaker's voice.
Tips & Pro Tips
- Use the built‑in remote on the Apple EarPods to mute instantly when the train makes announcements, preventing unwanted interruptions.
- Position the device’s antenna near a window of the subway car; metal walls can attenuate the signal, while a small gap improves reception.
- Consider a secondary audio source such as a lapel microphone attached to the earbuds cable for even clearer voice capture in extremely noisy stations.
- Schedule streams during off‑peak hours when the subway is less crowded, reducing background chatter and footfall noise.
Troubleshooting
No Audio Detected: Verify that the earbuds are selected as the input device in the streaming app. Disconnect and reconnect the USB‑C connector, then restart the app.
Frequent Dropouts: Check mobile data signal strength; if it falls below 3 bars, move to a different car or wait for the next train. A signal‑boosting antenna can mitigate this issue.
Distorted Voice: Reduce the microphone gain in the app settings and enable any available noise‑suppression filters. If distortion persists, replace the earbuds with a higher‑fidelity model such as the Nequga 50H IPX7 Wireless Earbuds.
Conclusion
By following the steps outlined above, one can successfully live stream from a subway while maintaining clear audio using earbuds. The combination of a reliable mobile connection, proper software configuration, and the ergonomic design of the Apple EarPods USB‑C ensures a professional result. Readers are encouraged to experiment with the suggested settings and adapt them to their specific transit routes for optimal performance.
Products Mentioned in This Guide
Apple EarPods USB‑C
Price: Not listed | Rating: Not listed
Features: Superior comfort geometry, high‑quality audio drivers, built‑in remote for volume and call control, integrated microphone, universal USB‑C compatibility.
Nequga 50H IPX7 Wireless Earbuds
Price: $13.99 | Rating: 4.8/5.0 (149 reviews)
Features: 50‑hour total playtime with LED power tracker, Bluetooth 5.3 up to 49 ft, 14.5 mm titanium drivers, sweat‑proof grip, three silicone tip sizes, touch control, IPX7 waterproof rating.
Frequently Asked Questions
What equipment is essential for live streaming from a subway using earbuds?
You need a smartphone or compact camera with USB‑C, a mobile data plan with at least 10 Mbps upload, a 10,000 mAh power bank, a tripod or grip, and noise‑cancelling earbuds with a built‑in mic.
How can I minimize background noise while streaming underground?
Use noise‑cancelling earbuds, keep the mic close to your mouth, enable software noise‑reduction, and avoid speaking directly into tunnel vents.
What mobile data speed is required for a stable subway live stream?
A minimum upload speed of 10 Mbps is recommended to maintain smooth 720p or 1080p video without buffering.
Can I use any earbuds microphone, or are specific models recommended?
Any earbuds with a built‑in mic will work, but noise‑cancelling models like Apple EarPods USB‑C provide clearer audio in noisy subway environments.
Are there any legal or safety considerations when live streaming on public transit?
Check the transit authority’s filming policies, avoid recording private conversations, and stay aware of your surroundings to prevent accidents.