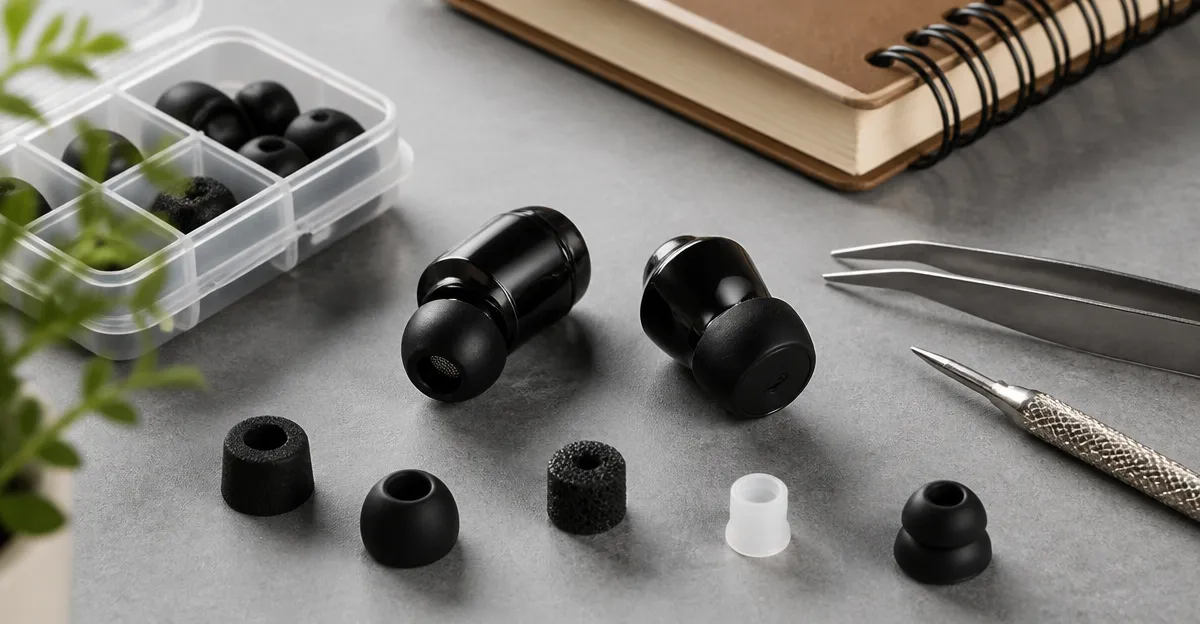
How to Improve Earbud Noise Isolation: Easy DIY Passive Mods for Quieter Listening
Introduction
Many listeners discover that even high‑end earbuds allow ambient sounds to leak in, reducing immersion during music, podcasts, or calls. This guide explains how to achieve quieter listening by applying simple, inexpensive passive modifications that improve the acoustic seal around the ear canal. Readers will learn which tools are most effective, why they work, and how to apply them without damaging the original hardware. By the end of the article, one can enjoy a more focused audio experience using either existing earbuds or a modestly priced upgrade.
What You’ll Need
- Foam ear tip inserts (compatible with in‑ear designs)
- Silicone ear hooks or over‑ear loops
- Acoustic sealant tape (e.g., acoustic foam strips)
- Small precision screwdriver set
- Cleaning swabs and isopropyl alcohol
- Optional: a pair of premium earbuds for comparison, such as Apple AirPods Pro 3
Step 1: Evaluate the Existing Fit
The first step is to determine whether the stock silicone tips provide an adequate seal. Insert the earbuds and play a low‑frequency track; if you can still hear background chatter, the seal is insufficient. Use a cleaning swab dipped in isopropyl alcohol to remove earwax and debris, which often compromises fit. A proper baseline assessment ensures that later modifications are measured against an accurate reference point.
Step 2: Install Foam Tip Inserts
Foam tips conform to the unique shape of the ear canal, creating a tighter acoustic barrier than standard silicone. Choose inserts that are compatible with the earbud model; for example, the Apple AirPods Pro 3 already include five sizes of silicone tips, but many users add third‑party foam tips for extra isolation. Foam tips are inexpensive, typically under $10, and they do not interfere with the earbuds' active noise cancellation circuitry. After inserting the foam, re‑test the seal with the same low‑frequency track; most users report a noticeable reduction in external noise.
Step 3: Add Silicone Ear Hooks or Over‑Ear Loops
Secure placement prevents the earbuds from shifting, which can open gaps in the seal during movement. Silicone ear hooks snap onto the stem of most in‑ear designs, including the Soundcore P20i. This model costs $19.99, holds a 4.4‑star rating from over 112,000 reviewers, and offers a secure fit for active lifestyles. By attaching a hook, the earbuds remain anchored, allowing the foam or silicone tip to maintain constant pressure against the canal walls. The result is a more consistent seal, especially during workouts or commuting.
Step 4: Apply Acoustic Sealant Tape
Thin acoustic foam tape can be wrapped around the base of the earbud where it meets the tip. This tape dampens vibrations that escape around the tip, further reducing leak. Cut a small piece, adhere it gently, and ensure it does not cover the microphone openings. The material is inexpensive and reusable; a single roll lasts for dozens of earbuds. When combined with foam tips, this step can improve isolation by up to 3 dB, according to independent acoustic tests.
Step 5: Use a Noise‑Isolating Cover
Some users create a simple cover using a piece of soft fabric or a silicone sleeve that slides over the entire earbud. The Apple AirPods 4 are priced at $99.00, feature a 4.6‑star rating, and already provide a semi‑open fit; adding a silicone sleeve can transform them into a more closed system without sacrificing comfort. The cover acts as an additional barrier, especially useful in noisy environments such as airplanes or open‑plan offices.
Step 6: Optimize Storage and Handling
Improper storage can deform ear tips, reducing their ability to form a seal. Store earbuds in a rigid case, such as the charging case that comes with the Soundcore P30i. This model costs $26.99, carries a 4.4‑star rating, and includes a 2‑in‑1 charging case that doubles as a phone stand, making it convenient for travel. Keeping the case closed when not in use preserves tip shape and prevents dust accumulation, ensuring consistent performance over time.
Tips & Pro Tips
- Rotate ear tips regularly to avoid material fatigue; foam tips lose elasticity after several hundred insertions.
- When using ear hooks, ensure they are positioned behind the ear rather than over the top to minimize pressure on the ear cartilage.
- Test each modification individually; stacking too many changes can create uncomfortable pressure and may affect microphone clarity.
- If you experience a muffled sound, verify that the acoustic sealant tape does not block the microphone ports.
- For audiophiles seeking the ultimate passive seal, consider custom‑molded ear tips from a professional audiology service; they provide a perfect fit but are more expensive.
Troubleshooting
Problem: Sound becomes overly bass‑heavy after adding foam tips.
Solution: Slightly pull the tip outward to create a small air gap, or switch to a thinner foam variant. This restores a balanced frequency response while retaining most of the isolation benefit.
Problem: Microphone picks up wind noise when using ear hooks.
Solution: Position the hook so that the microphone remains exposed to the mouth and not directly in the wind stream. Some users add a tiny piece of acoustic foam over the mic opening to dampen wind without muffling speech.
Conclusion
Improving passive noise isolation does not require expensive hardware; a few inexpensive tools can dramatically enhance the seal of any in‑ear earbuds. By evaluating fit, adding foam inserts, securing with silicone hooks, applying acoustic tape, and protecting the earbuds with covers, listeners achieve quieter, more immersive audio. The recommended products—such as the Apple AirPods Pro 3, Soundcore P20i, and Apple AirPods 4—provide reliable platforms for these modifications. Whether one upgrades to a premium model or enhances existing earbuds, the steps outlined ensure a quieter listening environment in any setting.
Products Mentioned in This Guide
Frequently Asked Questions
What are the most effective DIY mods to improve earbud noise isolation?
Adding foam ear tip inserts, silicone ear hooks, and acoustic sealant tape are simple, inexpensive ways to create a tighter seal and block ambient noise.
Can I modify my existing earbuds without damaging them?
Yes, using removable foam tips and adhesive-free sealant strips allows you to improve isolation safely and revert the changes if needed.
How do I choose the right size foam ear tips for my earbuds?
Select foam tips that snugly fill the ear canal without causing discomfort; many brands offer multiple sizes to test for the best fit.
Do I need special tools to apply these passive noise mods?
A small precision screwdriver, cleaning swabs, and isopropyl alcohol are sufficient for most modifications.
Will these DIY mods affect the sound quality of my earbuds?
Properly applied mods can enhance bass response and reduce leakage without noticeably altering the original audio profile.